
The Drone Project
Game Art Pipeline: Maya | Marmoset Toolbag | Substance Painter | Unreal Engine
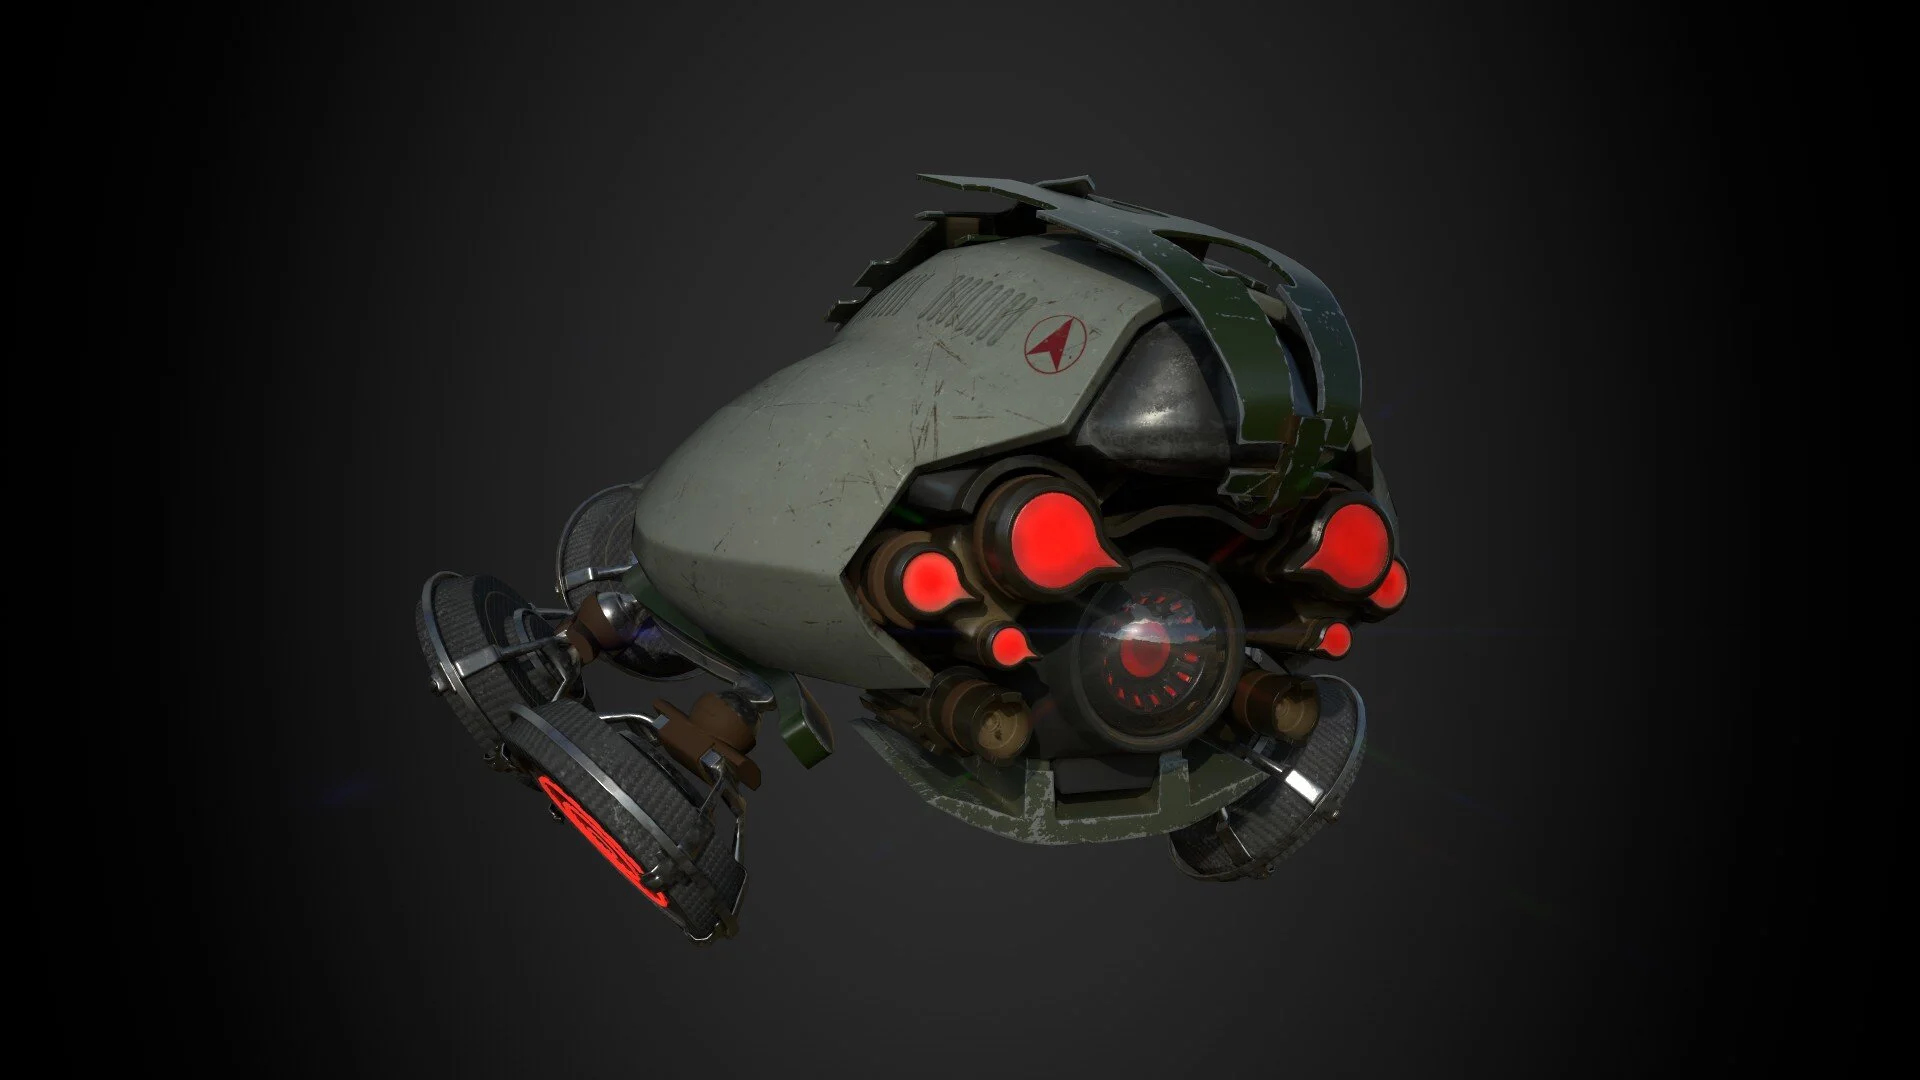
The Drone Project was manifested to hands on learn the AAA game art pipeline for hard surface modeling from Autodesk Maya into Unreal Engine 4.26, carried out over a 6 week period with expert tuition from CG Spectrum 3D modeling mentor and veteran game artist Clinton Crumpler.
It was a key requirement that we really explored the process the ‘AAA way’ and as a result this elongates the art pipeline by requiring two versions of the model to be prepared: the original which is a high poly smoothed version, and a second version which has a low enough poly count to be optimised for realtime rendering, with a high level of detailing baked into the object.
Stage 1: High Poly Modeling in maya
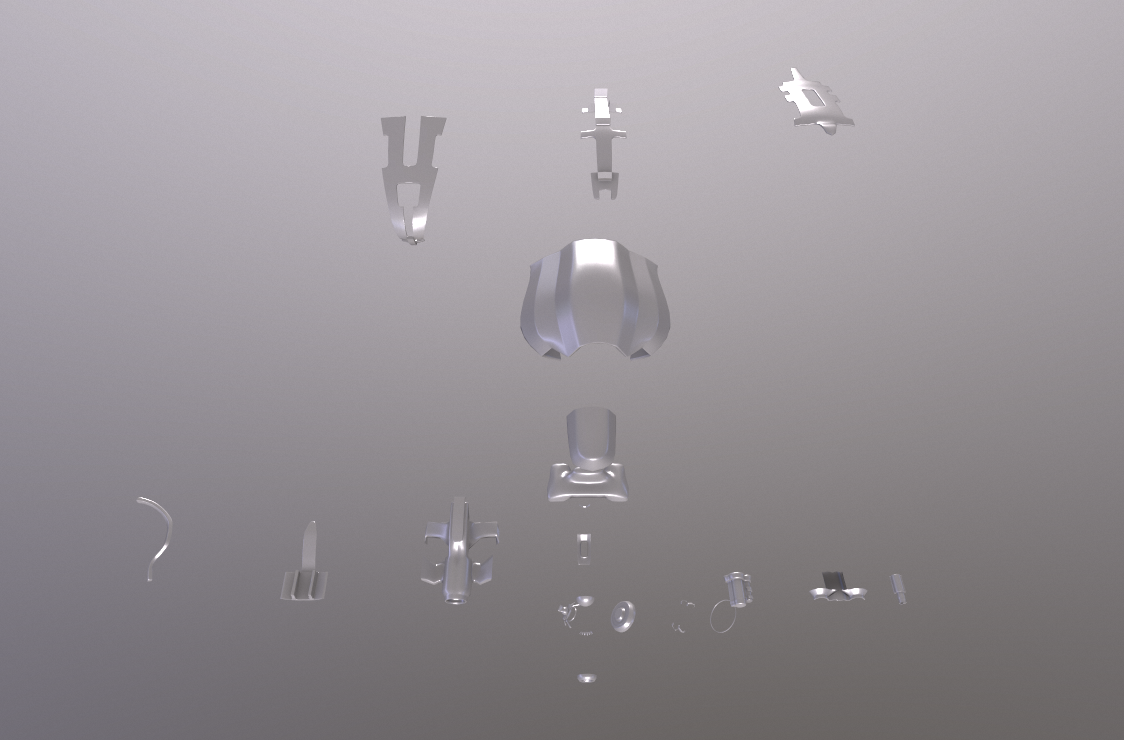
The first stage of the process is to build the model from reference imagery, in this case I was fortunate enough to be able to accurately reference against an existing plan, front and side elevation alongside guided tuition to create the advanced bodywork and machined parts that make up the form of the drone.
The high poly modeling process requires the addition of supporting edges so that the model can be smoothed to give the distinct form and a high end cinematic appearance.

Stage 2: Low Poly version | UV sets | ID assignment | disassembly
From this point the art production process becomes a bit of a black art that you pick up through expert guidance.
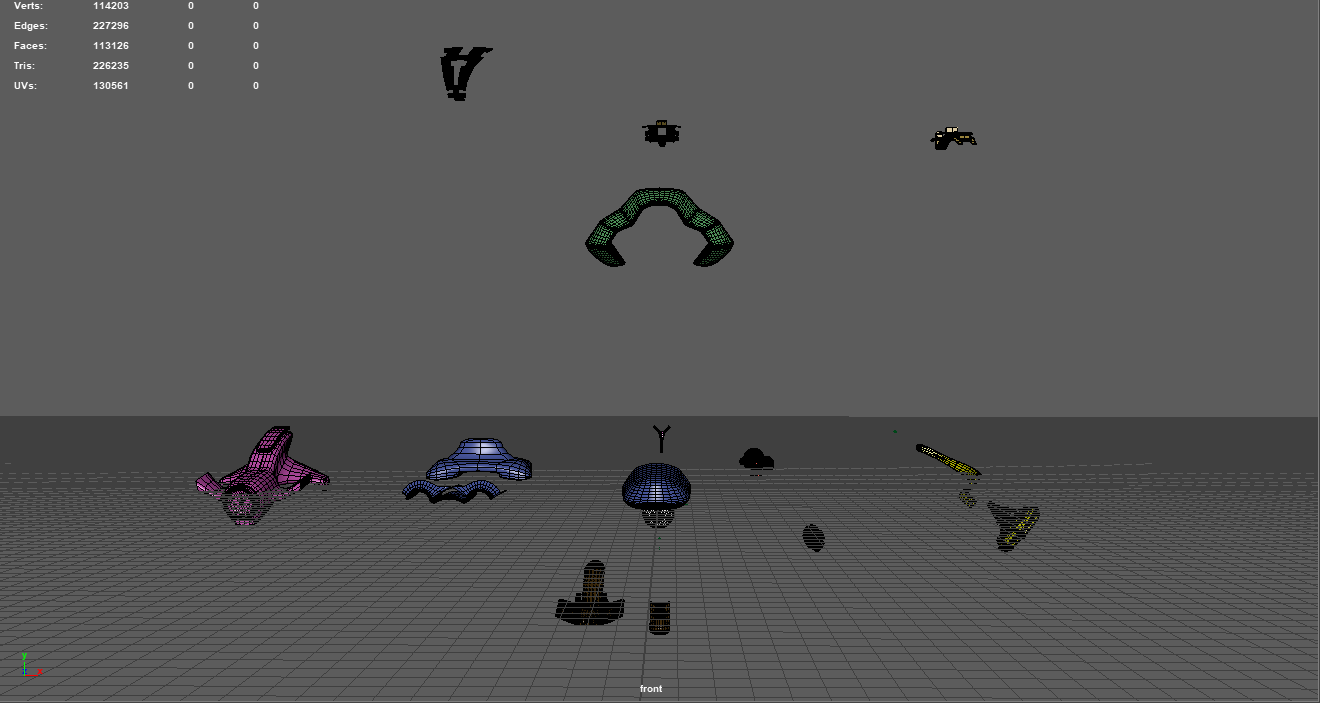
You need to clean up or reconstruct every part of the model in order to reduce the poly count to something that is acceptable for realtime rendering. The poly count range will be dictated by the studio you are working with, and is also dependent upon the ‘importance’ of the asset, the distance it can be seen from the player, the target platform and whether it is used as a gameplay asset or a cinematic asset. In a AAA context you may also make different versions of the model with different levels of detail.
You need to ensure that there are no N-gons (polygons with more than 4 sides), and you prepare all of your edges for baking. The general rule is that a 90 degree transition between faces or greater is a hard edge and the rest are soft. The process has zero tolerance for bad geometry and duplicated vertices. First time around this becomes quite time consuming, although the problems you experience tend to be the same issues of stray faces inside the model and vertices that need to be removed or merged.
Most importantly as you reduce the poly count it can affect the shape of the object, and the key requirement is that ‘the low poly needs to hold the silhouette of the high poly’ for the baking process to work effectively. In my case I had to run this process twice because I didn’t grasp precisely how to do this the first time.
At the same time you look out for elements of the object which can be removed entirely in the low poly model and instead are baked into the object using normal maps - for example bevels, insets and small surface protrusions and details.
Once you are happy with the low poly parts you then create your UV sets. These are the surfaces of the 3D object represented in a 2D space and what is used for texturing the object and creating the baked maps.
You separate your UVs into parts based mainly on the placement of your hard edges and in a way that avoids UV stretching whilst minimising seams, and you arrange them in 0 to 1 space across multiple sets. You also need to pay attention to the texel density of the UVs, which is dictated by a number of varying factors (for an in depth explanation, head here). In my case the drone was distributed over 3 UV sets.
At this stage of the process you also need to assign a different material to every different textured surface within the high poly model (eg, rubber = yellow, powder coated metal = green, etc), which is what generates the Material ID map used for texturing. You also assign a different material to each group of parts that form one UV set in the low poly model (this is how Marmoset knows which UV set is applicable to which part of the model).
Finally you explode all the parts using the animation slider in order to keep them separated in the baker to avoid baking issues from overlapping geometry, and you export both the high and low poly as separate FBX files sharing identical world space coordinates.
STAGE 3: NORMAL | AMBIENT OCCULSION | ID BAKE IN MARMOSET
At this point you bring the model into Marmoset Toolbag in order to bake the normal, ambient occlusion and material IDs. Marmoset has an excellent range of supportive materials for you to learn the baking process, however it is through a mixture of live guidance and trial and error that you establish how to carry out your bake. In my case I ran three baking iterations by tweaking my model in Maya and reimporting it. The video below demonstrates how the details from the high poly are baked into the low poly using normal maps.
STAGE 4: FINAL FBX ASSEMBLY IN MAYA | BAKE & TEXTURE IN SUBSTANCE
Once you are happy with your baked results you return to Maya to prepare your final FBX model. If you have any identical parts you may only want to bake one part and then duplicate the part to complete the final model (meaning that each part will share the same UV space and be textured identically).
Upon importing the model into Substance Painter the fun really begins as you give the drone its final look and feel. You import your maps from Marmoset whilst also baking additional ones in Substance (in my case - world space normal, curvature, thickness and position). These additional maps enable you to use Substance Painter’s powerful Smart Material features.
This stage of the pipeline is a ‘pimp your drone’ exercise and Substance is hugely intuitive to pick up, learn and start having fun within a couple of hours. It allows you to create material types, paint finishes, add additional normal details (I added some air vents), decals, dirt/grime, surface wear/scratches and emissive features.
Happy with your model? Render it out using IRAY within Substance to see it come to life!

STAGE 5: PBR VALIDATION | TEXTURE EXPORT IN SUBSTANCE
One point to note is that emissive materials in Unreal are made using Unreal shaders rather than by painting them in Substance (in Substance you would give your final emissive export a transparent material).
You also need to ensure that your textures conform to the PBR range values. In my case some metal materials were too dark and I had to brighten the model up and swap materials from metals to non-metals, which have a higher PBR range. This can be easily worked out using a handy PBR plug-in within Substance Painter.
Now you set up your model to export multiple texture sets ready for Unreal (Albedo, Emissive, Normal, Roughness, Metallic, Ambient Occlusion).

STAGE 6: SHADER CREATION | CINEMATIC SEQUENCING IN UNREAL
The final stage is to import your model into Unreal and create a master material which is what you use to plug your texture sets into the model. You create instances of the material for each UV set. Clinton guided me to convert the emissive texture set into a configurable parameter meaning I could tweak the emissive colour and brightness in the editor to suit the environment. At this point I also needed to make a 4th UV set as the glass dome at the front of the model needed to be divided out so it could have its own custom shader.
Now Clinton really started to flex his technical art prowess by demonstrating the intricacies of crafting a beautiful custom shader for glass within Unreal Engine. You have the ability to configure the reflectivity using fresnel lens principals, allowing you to tweak the refraction levels at different parts of the surface. You can also apply additional normal maps to the glass surface to slightly offset the reflection. This gives you the ability to produce an advanced level of photorealism to the appearance of glass.
With the model ready to go it was time to set up a short cinematic using Unreal’s hugely intuitive level sequencing functionality. This sequence was composed using a marketplace demonstration level as the backdrop. It was shot in cinemascope with a 3 camera setup including a jib crane, with post processing effects animated per camera in realtime to accent the lens flare and bokeh effect of the emissive at key points in the sequence to create a more cinematic feel.
What’s next? I’ve started the whole process again with Clinton by preparing a high quality 50m tall Martian Tripod for Unreal implementation - a more advanced project with its own unique nuances and intricacies.
